
Are you looking for ways to keep your motorcycle looking its best without spending a fortune on professional detailing services? Look no further than motorcycle DIY detailing. Not only is it an affordable option, but it also allows you to personalize the process and ensure your bike receives the attention it deserves.
In this section, we’ll examine motorcycle detailing, its importance, and how to complete the process yourself with just a few basic materials. Whether you’re a seasoned rider or new to the game, this guide will offer all the essential tips and tricks to keep your motorcycle looking new.
Preparing Your Motorcycle for Detailing
Before you start detailing your motorcycle, it is important to prepare it properly. This will help you achieve the best results and protect your motorcycle’s sensitive components.
Here are the essential steps recommended by a reputable detailing company for preparing your motorcycle for detailing:
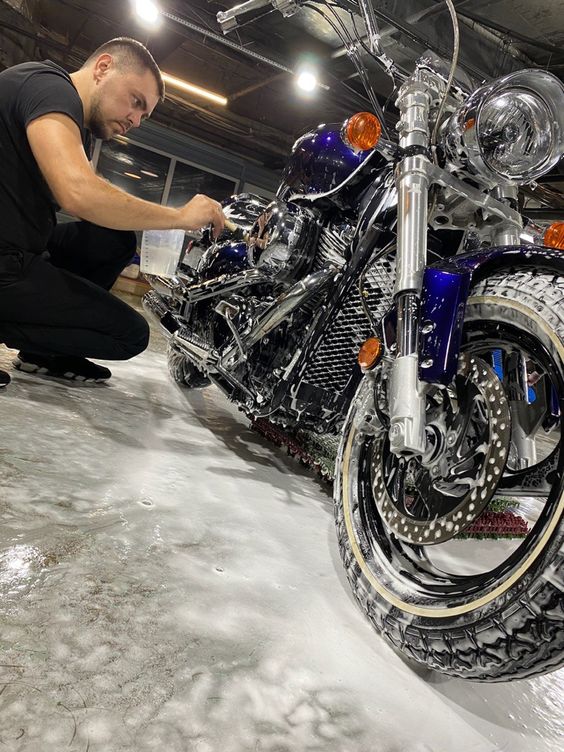
Clean your motorcycle
Use a mild soap solution to clean your motorcycle thoroughly. You can also use a pressure washer to remove any dirt or grime that has built up on the surface of your motorcycle. Be sure to rinse your motorcycle thoroughly with water to remove all traces of soap. If possible, avoid using harsh chemicals that can harm your motorcycle’s paint job.
Remove debris
Next, use a soft brush or microfiber cloth to remove debris from corners, crevices, and hard-to-reach areas. This step is crucial to ensure your motorcycle is clean and ready for detailing.
Protect sensitive parts
Some parts of your motorcycle are more sensitive and can be easily damaged during detailing. Use masking tape or plastic wrap to cover these parts, such as the electrical components, mirrors, and exhaust pipes.
Choose the right cleaning products
Not all cleaning products are created equal, so choose wisely. Choose products specifically designed for motorcycles to avoid damage to your motorcycle’s paint and finish. Look for products with a pH-neutral formula for best results.
Step-by-Step Motorcycle Detailing Process
Now that you have prepared your motorcycle for detailing, it’s time to begin the process. Below is a detailed breakdown of the steps involved in achieving a professional-looking finish:
| Step | Description |
|---|---|
| 1 | Washing |
| The first step is to wash your motorcycle thoroughly. Use a high-quality cleaner and a microfiber towel to remove all dirt and grime from the bike’s surface. | |
| 2 | Drying |
| After washing, use a clean microfiber towel to dry your motorcycle. Make sure to remove all water spots. | |
| 3 | Polishing |
| Apply a high-quality polish to your motorcycle’s surface to restore its shine. Use a microfiber towel to buff the surface until it shines. | |
| 4 | Waxing |
| Apply wax to your motorcycle’s surface to protect it from the elements. Use a microfiber towel to buff the wax until it shines. | |
| 5 | Protecting |
| Use a protective coating to prevent dirt and grime from sticking to your motorcycle’s surface. Apply the coating evenly using a microfiber towel. |
Remember to work in small sections and use a clean microfiber towel for each step. This will help ensure an even finish and prevent scratches or swirl marks from appearing on your motorcycle’s surface.
Following these steps, you can achieve a professional-looking finish that will keep your motorcycle looking great for years.
Tips and Tricks for Motorcycle Detailing
Detailing your motorcycle can be challenging, but with the right techniques and tools, you can achieve professional-looking results. Here are some tips and tricks from a professional detailing company to enhance your detailing process:
- Clean hard-to-reach areas: Use a small detailing brush or a toothbrush to clean tight areas and crevices around the engine or under the seat.
- Remove stubborn stains: Use a degreaser or a specialized motorcycle cleaner for tough stains, such as grease or oil. Apply the cleaner directly to the stain and let it sit for a few minutes before wiping it off with a microfiber towel.
- Protect sensitive parts: When cleaning or polishing plastic or chrome parts, use a specialized product that is safe for these materials. Avoid harsh chemicals or abrasive materials that scratch or damage the surface.
- Apply wax evenly: When applying wax, use a foam applicator pad and work in small sections. Spread the wax evenly and allow it to dry before buffing it off with a clean microfiber towel.
- Maintain your motorcycle’s shine: Use a quick detailer spray to keep your motorcycle looking shiny between detailing sessions. Simply spray the product onto the surface and wipe it off with a microfiber towel for an instant shine.
Conclusion
Mastering the art of motorcycle DIY detailing can significantly enhance your riding experience and keep your bike looking its best. Following the step-by-step guide in this article, you can confidently tackle various cleaning, polishing, and maintenance tasks, ensuring that your motorcycle stays in prime condition.
Remember to start with the basics, gathering all the necessary tools and materials before diving into the detailing process. Take the time to understand your motorcycle’s specific cleaning requirements, such as the appropriate cleaning agents and techniques for different parts, including the bodywork, wheels, engine, and exhaust.
Regularly cleaning your motorcycle enhances its aesthetic appeal and protects it from harmful elements like dirt, grime, and corrosive substances. You can effectively remove dirt and restore the shine of various surfaces by employing proper cleaning techniques, such as using microfiber cloths, brushes, and detailing products designed for motorcycles.
Frequently Asked Questions about Motorcycle Detailing
Are you new to motorcycle detailing? Do you have questions about it? Here are the most common queries about motorcycle detailing:
How often should I detail my motorcycle?
It’s recommended to detail your motorcycle every three months or more often if you ride frequently or in harsh conditions. Regular detailing keeps your motorcycle in good condition and helps prevent rust and corrosion.
Will detail damage my motorcycle’s paint?
If you use the right products and techniques, detailing won’t damage your motorcycle’s paint. It’s important to use gentle cleaners and microfiber towels to avoid scratches and swirl marks. If you’re not confident, consult a professional detailing service.
Can I detail my motorcycle engine?
You can detail your motorcycle engine, but it requires careful preparation to protect sensitive electrical components. Use a degreaser and a soft brush to clean dirt and grime, then rinse well with water. Apply a protective coat of wax to prevent rust and corrosion.
What’s the difference between waxing and polishing?
Waxing adds a protective layer to your motorcycle’s paint while polishing removes imperfections and restores shine. Polishing is more aggressive and should only be done when necessary. Waxing can be done regularly to keep your motorcycle looking good.
How do I clean leather seats and accessories?
Use a specialized leather cleaner and conditioner to clean and protect your motorcycle’s leather seats and accessories. Avoid using water or harsh chemicals that can damage the leather. Apply the products with a soft cloth and buff gently to restore the shine.
Should I take my motorcycle to a professional detailing service?
If you’re not confident in your motorcycle detailing skills or want a professional finish, taking your motorcycle to a detailing service is a good option. They have the experience, tools, and products to achieve a superior result. However, expect to pay a premium price for their services.
By following these tips and answering these questions, you’ll be able to keep your motorcycle looking great and performing well for years to come.